

Happy November!:)
Days get shorter, lights get darker, weather going to turn on winter - mode, this time of the year, we prefer to stay inside, work a little bit on our home interior, to make it cozy and warming.
What do you think about a pillowcase DIY? :)
Oh yes, NATU boxes offering an easy way to show you how make a unique pillowcase, in a natural looking way, with all the things packed what you need for this project.
Grab a cup of coffee or tea, and let's get started! :)
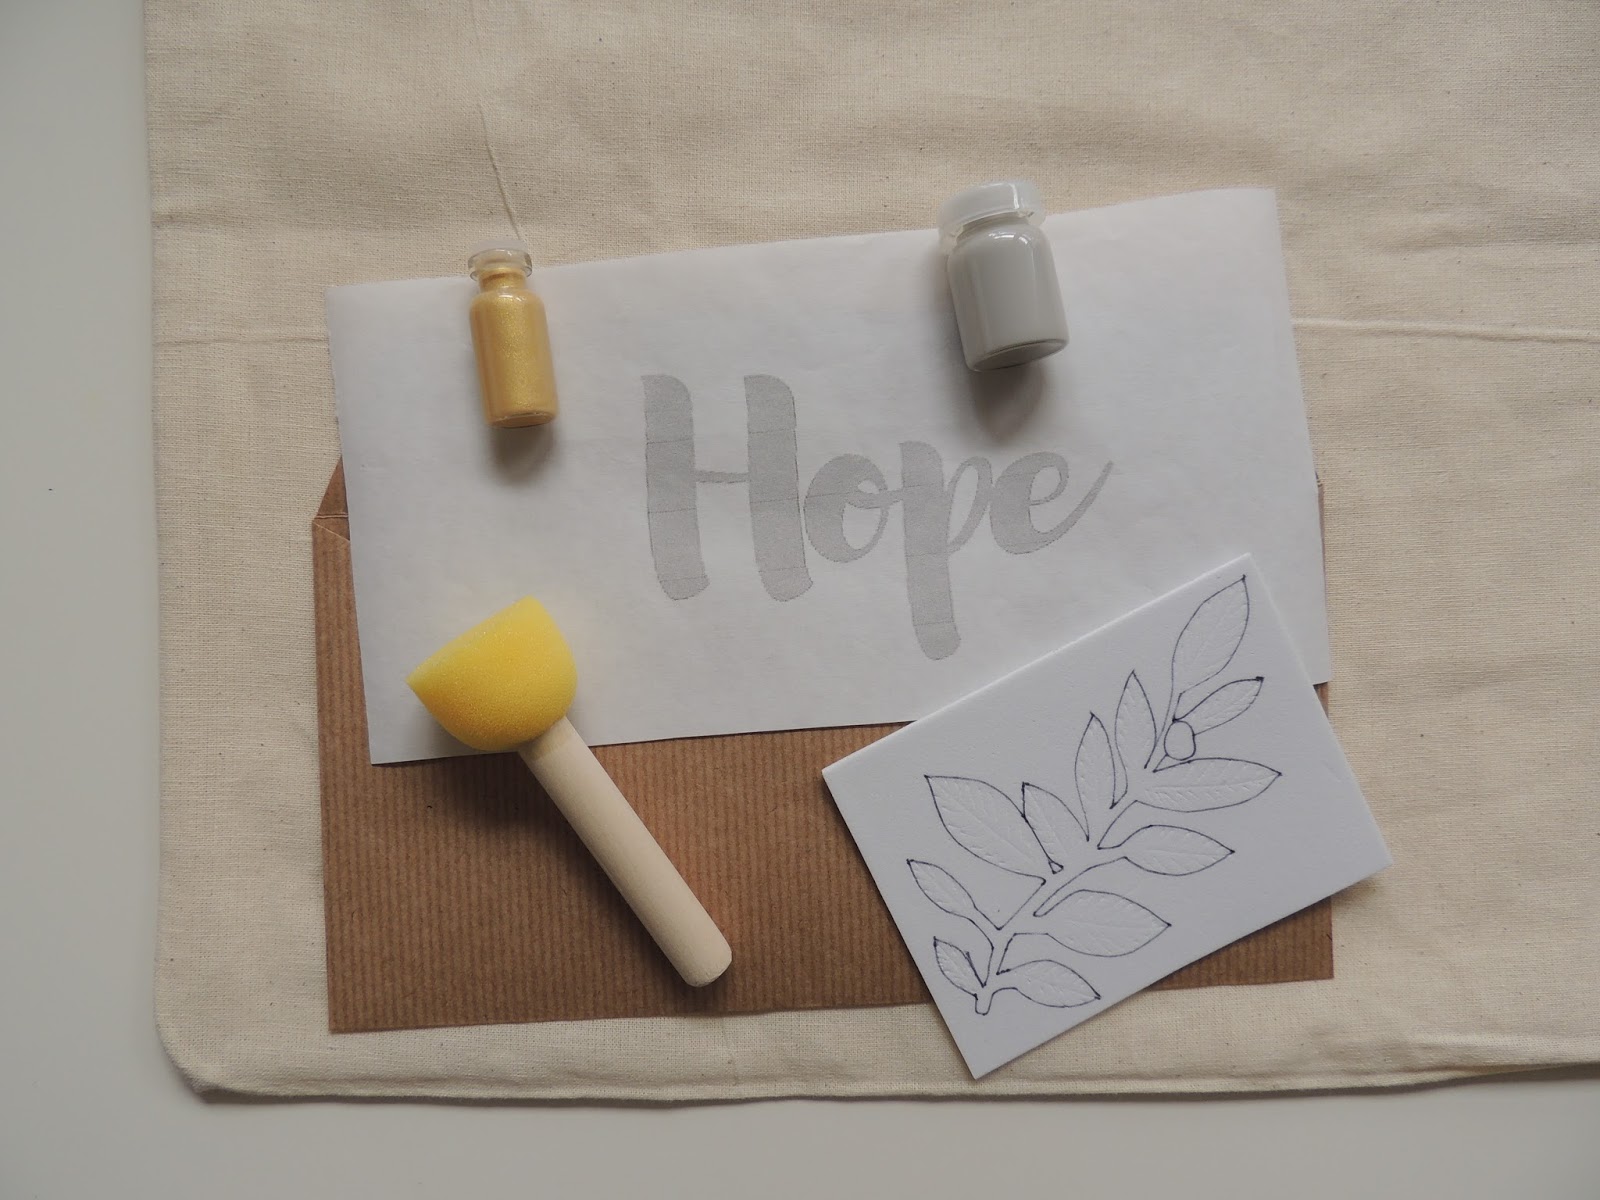
Open your DIY kit, let's see what you can find in the pack:
- inside an envelope: freezer paper, print of positive message and a piece of decor foam
- two glass of paint (for textile)
- sponge brush
- pillow case made of a cotton bag
You need a pair of scissor, and some used paper or old newspaper.
////////
Boldog Novembert!:)
A nappalok rövidülnek, a fények sötétednek, az időjárás téliesre vált - ebben az időszakban jobban szeretünk otthon maradni, kicsit változtatni a lakás berendezésén, hogy kényelmesebbé, melengetőbbé tegyük.
Mit szóltok egy CSINÁLD MAGAD! párnahuzathoz?
Ó, igen, a NATU dobozokban prezentálják, hogyan készíts természetes hatású, egyedi párnahuzatot, méghozzá úgy, hogy mindent eszközt amire szükséged van becsomagoltak neked.
Hozz egy csésze kávét vagy teát, és kezdjük el!:)
Nyisd ki a DIY csomagodat, és nézzük meg mit találsz benne:
- a boríték belsejében: 'freezer paper' egy pozítív üzenettel (ez egy anyagra vasalható papír, ami abban fog segíteni, hogy ne folyon szét a festék a párnahuzaton) és egy dekorgumi, amire egy levelet rajzoltunk
- két kis üveg festék
- szivacs ecset
- Pamut szatyorból átalakított párnahuzat
Amire még szükséged lesz, de nincs a dobozban: olló és régi újságpapír, vagy bármilyen papír, amit már nem használsz.
Step 1:
Open the envelope and cut out the leaves from the decor foam.
/////////
1. Lépés
Nyisd ki a borítékot és vágd ki a levélformát a dekorgumiból.
Step 2:
Open the envelope again and cut out the written word of the freezer paper. The shiny side of the paper will stick on the cotton pillowcase when you warm it with the iron.
////////
2. Lépés
Nyisd ki a borítékot és most a feliratos "freezer paper-ből" vágd ki a szöveget. Figyelj arra, hogy nem minden betűt tudsz kivágni egyből, lehet, hogy az ékezet vagy jelen esetben az "o" betű pocakja/közepe kimarad, ezt utólag ki tudod vágni - még a festés előtt - de nekem tetszett ez a telített 'o' betű, így a képen látható módon vágtam ki. A "freezer paper" csillogóbb oldala kerül közvetlenül a párnahuzatra, mert ez hő hatására odatapad az anyaghoz, így mikor festünk nem folyik alá a festék. Vigyázz, hogy csak egy picit vasald és ne túl nagy hőfokon. Amint rátapadt az anyagra készen is vagy.
Step 3:
Open out the pillowcase - make sure the opening side is on the top - and find a place for your message, you can paint it in the middle or wherever you like.:) Try it, before you do the ironing part.
///////
3. Lépés
Hajtogasd ki a párnahuzatot - figyelj rá, hogy a kis nyílás legyen a tetején - ott tudod majd később magát a párnát beletenni - tetszőlegesen illeszd rá a kivágott szöveget a csillogós felével az anyagra és vasald rá.
Step 4:
You need to put some used paper or old newsprint inside the pillowcase, because the cotton will be stick with the paint. Then iron the freezer paper and paint the text.
////////
4. Lépés
A párnahuzat belső részébe tegyél egy használt papírt, vagy újságpapírt, hogy a festék ne tapadjon rá a másik oldalra is.

Step 5:
Find the decor foam leaves and try to set them on the pillowcase. I made a wrest, but do not be afraid to cut it into pieces - just use your creativity. :) To draw a circle - I used a small plate. Paint the scratched side of the leaves and imprint it on the fabric.
/////////
5. Lépés
Helyezd rá az anyagra a levélmintát, próbáld ki hogyan szeretnéd. Én egy koszorú formát készítettem. Ha van kedved szét is vághatod a leveleket, légy kreatív! :) A kör megrajzolásához egy kistányért használtam segítségként. A levelek karcolt oldalát fesd be - itt a levélerezetet akartuk szimbolizálni - és nyomd rá az anyagra.


Step 6:
You are almost ready.
Let the pillowcase dry for a day, and after turn the pillowcase inside out, (take out the paper!) iron the inside of the fabric - this is how you fix the painted area, so if you wash it later, the painting will stay on the fabric.
Wash it maximum on 30 Degrees, prefered with hand not with a washing machine.
The leaves and the writing part give you a lot of idea to use them. Actually, after making one pillowcase, you can wash the decor foam, and let it dry and use again! The freezer paper can be reusable too, dry it and paint something else.:)
////////
6. Lépés
Már majdnem készen vagy.
Hagyd a festést megszáradni egy napig, majd fordítsd ki a párnahuzatot és vasald át az egészet; így tudod fixálni a festéket, hogy mosásnál ne legyen probléma a későbbiekben. Maximum 30 fokon mosd, a legjobb ha csak kézzel és nem teszed be a mosógépbe.
A levelek és a szöveg is újrahasználható, a dekorgumit ki lehet mosni, és száradás után újra fel tudod használni. A 'freezer paper-ből' kivágott feliratot száradás után még egyszer fel lehet használni.
Here are other options:
////////
Íme néhány opció:

We hope you like it, it was a pleasure to prepare this DIY kit for you!
Have a happy day, maker! :)
Read about the other DIY kits and the whole concept of the NATU here.
////////
Reméljük tetszik, mert számunkra öröm volt előkészíteni ezeket a csomagocskákat!
Szép napot!:)
Olvass bővebben a többi DIY csomagról, illetve a NATU koncepcióról itt.


CONVERSATION